Setting Up Your First Sale in Rockit Sales
Please follow these steps to create and activate your first sale using Rockit Sales Manager.
How Rockit Works
Rockit applies discounts by editing product prices in bulk.
When a sale is activated:
- The discounted price is written as the current price
- The previous price is stored as the compare-at price
Your theme then automatically shows:
- A crossed-out original price
- Sale badges (depending on your theme)
Rockit does not change your theme design.
To display discounted prices in the cart, a small theme edit may be required — our team can help with that.
Step 1: Create a New Sale
- Open Rockit Sales → Create sale
-
Enter an internal sale title (not visible to customers)
Choose the discount value (percentage or fixed)
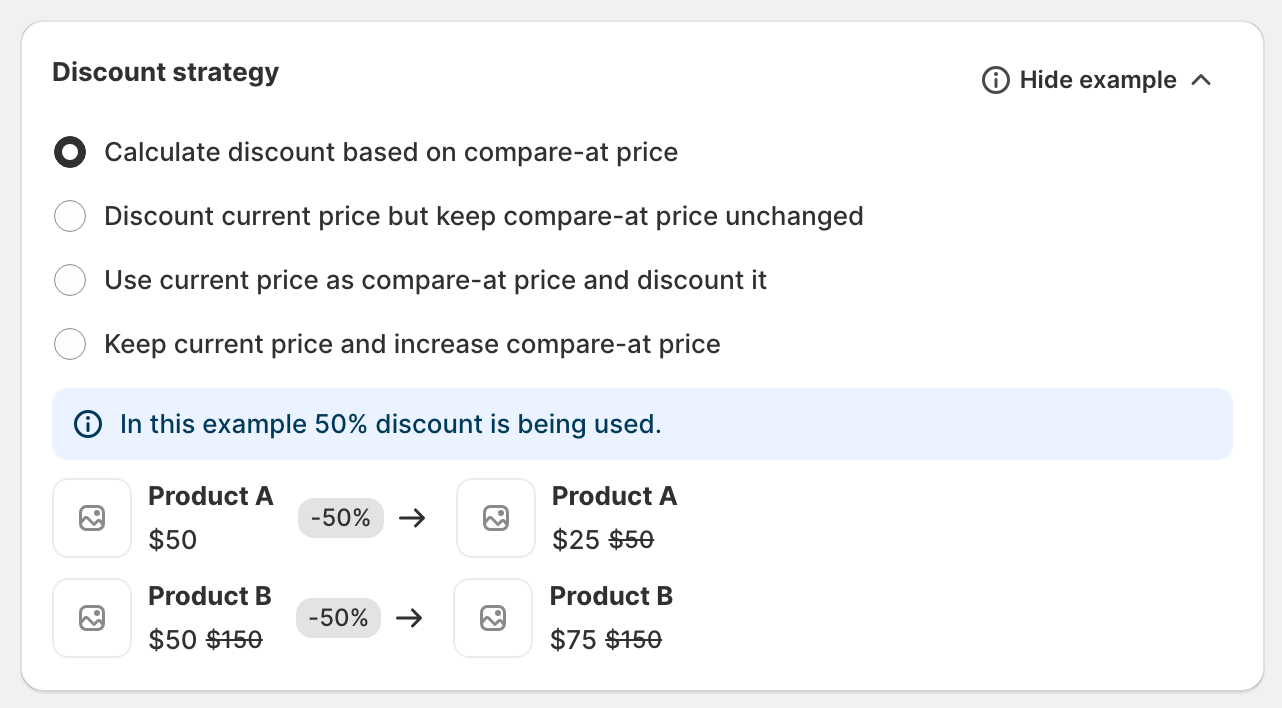
Select a discount strategy:
- Calculate discount based on compare-at price (recommended)
- Or use another strategy depending on your setup
Step 2: Select Products to Discount
- Under Applies to, choose:
- Products/Variants
- Collections
- Tags
- Vendors
-
Whole store
Optionally exclude:
- Draft products
- Products already on sale
- Specific products or variants (you can filter by collections/tags/vendors)
If multiple Rockit sales overlap:
- Enable “Allow this sale to override other Rockit discounts” if needed
Step 3: Set Dates and Activate
-
Set the start date and time
(Optional) Set an end date
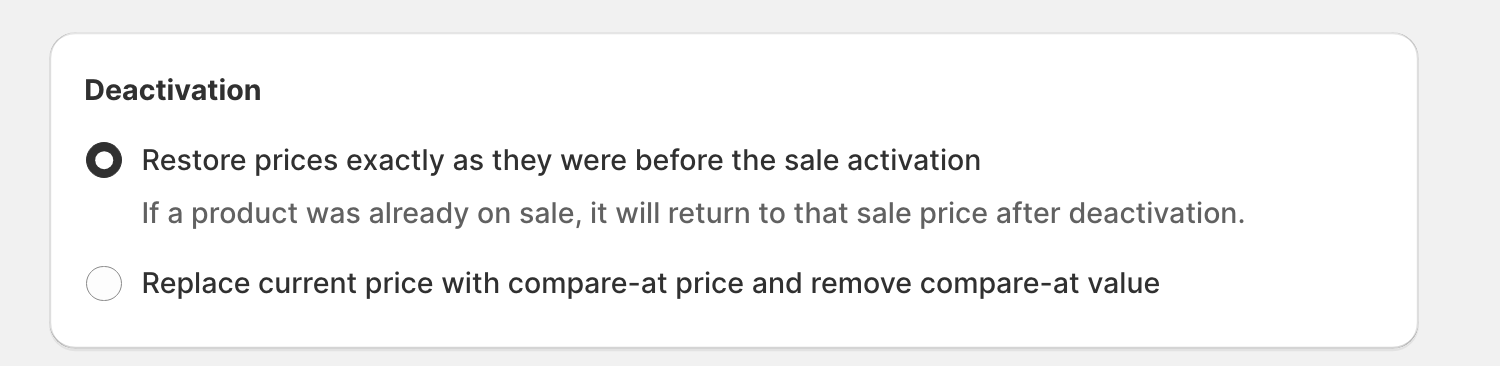
Choose what happens on deactivation:
- Restore prices exactly as they were before activation (recommended)
- Or reset prices using compare-at values
- Activate the sale
Once activated, prices update automatically across the store.
Additional Sale Features
When activating a sale in Rockit, you can optionally configure the following features to work automatically alongside your discounted prices:
1. Product Page Timer
If enabled, the product page countdown timer is automatically configured using the sale’s end date when the sale is activated.
No manual setup is required; the timer will start and end in sync with the sale.
2. Product Tags
Rockit can automatically manage product tags during the sale lifecycle:
-
Tags to add during sale activation
These tags are applied when the sale starts and are automatically removed when the sale is deactivated.
-
Search tags to remove during sale activation
These tags are temporarily removed while the sale is active and are restored upon deactivation.
This makes it easy to control product visibility, collections, and search behavior without manual cleanup once the sale ends.
After Activation: Important Notes
- If you add products, edit collections, or update prices, click Reactivate so Rockit can resync the sale
- Avoid manual price edits or other pricing apps during an active sale, as they can override Rockit’s changes
- If your store uses another inventory or pricing system, consider disabling it temporarily during the sale
Confirm Everything Is Working
- Check a product page to confirm the sale price and compare-at price
- Preview the cart to verify pricing
- Use the Preview feature in Rockit if some products aren’t discounted
That’s it! Your first Rockit sale is live 🎉